以前一直没管过UI,最近因为一个安卓软件做得太丑被好多同事吐槽,我一个不会UI的人让我怎么写得好看?只能使用现成的UI框架,比如腾讯的QMUI框架就不错,就是腾讯的说明文档实在是有点坑,跟X5浏览服务一样,必须仔细阅读才能理解到开发者的意思,而且都TM不写使用方法,给个demo自己看例子去,擦,大厂真的屌!花了我几个小时看demo,成功将UI弄得好看了些,勉强先用着吧。这里写个简单的例子,给大家分享下使用QMUI腾讯UI框架实现安卓通知栏沉浸效果。
QMUI Android介绍
QMUI Android 的设计目的是用于辅助快速搭建一个具备基本设计还原效果的 Android 项目,同时利用自身提供的丰富控件及兼容处理,让开发者能专注于业务需求而无需耗费精力在基础代码的设计上。不管是新项目的创建,或是已有项目的维护,均可使开发效率和项目质量得到大幅度提升。
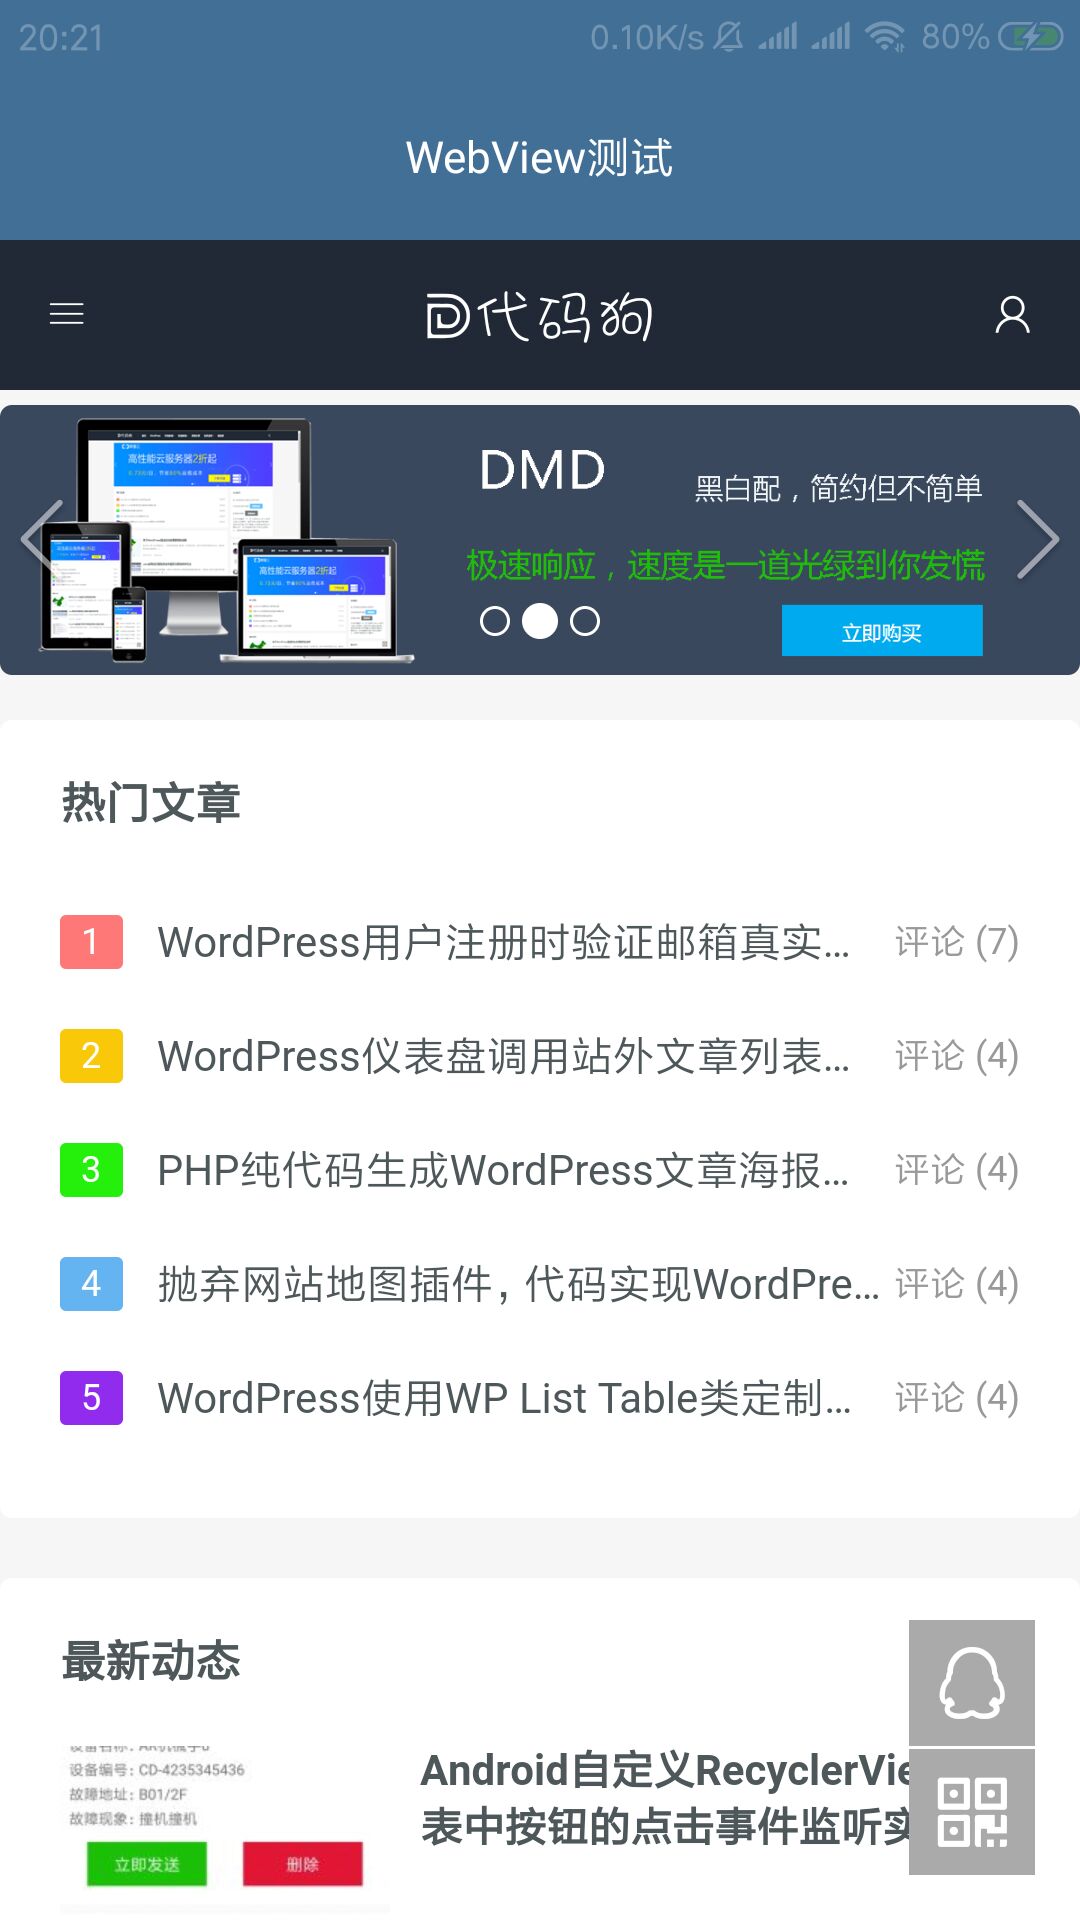
QMUI腾讯UI框架实现安卓通知栏沉浸效果
Android Studio添加依赖
implementation 'com.qmuiteam:qmui:1.2.0'配置主题样式
修改你的项目的style.xml文件中关于AppTheme的parent地址,如下所示
 <!-- Base application theme. -->
    <style name="AppTheme" parent="Theme.AppCompat.Light.DarkActionBar">
        <!-- Customize your theme here. -->
        <item name="colorPrimary">@color/colorPrimary</item>
        <item name="colorPrimaryDark">@color/colorPrimaryDark</item>
        <item name="colorAccent">@color/colorAccent</item>
    </style>
修改为
<!-- Base application theme. -->
<style name="AppTheme" parent="QMUI.Compat.NoActionBar">
    <!-- Customize your theme here. -->
    <item name="colorPrimary">@color/colorPrimary</item>
    <item name="colorPrimaryDark">@color/colorPrimaryDark</item>
    <item name="colorAccent">@color/colorAccent</item>
</style>
注意对比哟,到此引入QMUI框架成功,下面看看上图是怎么实现的。
XML布局
<?xml version="1.0" encoding="utf-8"?>
<com.qmuiteam.qmui.widget.QMUIWindowInsetLayout
    xmlns:android="http://schemas.android.com/apk/res/android"
    android:layout_width="match_parent"
    android:layout_height="match_parent"
    android:background="?attr/qmui_config_color_background">

    <com.qmuiteam.qmui.widget.QMUITopBarLayout
        android:id="@+id/topbar"
        android:layout_width="match_parent"
        android:layout_height="wrap_content"
        android:fitsSystemWindows="true">
    </com.qmuiteam.qmui.widget.QMUITopBarLayout>

    <com.qmuiteam.qmui.widget.webview.QMUIWebViewContainer
        android:id="@+id/webview_container"
        android:fitsSystemWindows="true"
        android:layout_marginTop="?attr/qmui_topbar_height"
        android:layout_width="match_parent"
        android:layout_height="match_parent">

    </com.qmuiteam.qmui.widget.webview.QMUIWebViewContainer>

</com.qmuiteam.qmui.widget.QMUIWindowInsetLayout>
QDWebView控件类,这个你可以不用它,使用Android自带的webview也是一样的,我这里直接拿的官方demo中的代码。
public class QDWebView extends QMUIWebView {

    public QDWebView(Context context) {
        this(context, null);
    }

    public QDWebView(Context context, AttributeSet attrs) {
        this(context, attrs, android.R.attr.webViewStyle);
    }

    public QDWebView(Context context, AttributeSet attrs, int defStyleAttr) {
        super(context, attrs, defStyleAttr);
        init(context);
    }

    @SuppressLint("SetJavaScriptEnabled")
    protected void init(Context context) {
        WebSettings webSettings = getSettings();
        webSettings.setJavaScriptEnabled(true);
        webSettings.setSupportZoom(true);
        webSettings.setBuiltInZoomControls(true);
        webSettings.setDefaultTextEncodingName("GBK");
        webSettings.setUseWideViewPort(true);
        webSettings.setLoadWithOverviewMode(true);
        webSettings.setDomStorageEnabled(true);
        webSettings.setCacheMode(WebSettings.LOAD_NO_CACHE);
        webSettings.setTextZoom(100);

        if (Build.VERSION.SDK_INT >= Build.VERSION_CODES.LOLLIPOP) {
            webSettings.setMixedContentMode(WebSettings.MIXED_CONTENT_COMPATIBILITY_MODE);
        }

        String screen = QMUIDisplayHelper.getScreenWidth(context) + "x" + QMUIDisplayHelper.getScreenHeight(context);
        String userAgent = "QMUIDemo/" + QMUIPackageHelper.getAppVersion(context)
                + " (Android; " + Build.VERSION.SDK_INT
                + "; Screen/" + screen + "; Scale/" + QMUIDisplayHelper.getDensity(context) + ")";
        String agent = getSettings().getUserAgentString();
        if (agent == null || !agent.contains(userAgent)) {
            getSettings().setUserAgentString(agent + " " + userAgent);
        }

        // 开启调试
        if (BuildConfig.DEBUG && Build.VERSION.SDK_INT >= Build.VERSION_CODES.KITKAT) {
            setWebContentsDebuggingEnabled(true);
        }
    }

    public void exec(final String jsCode) {
        if (Build.VERSION.SDK_INT >= Build.VERSION_CODES.KITKAT) {
            evaluateJavascript(jsCode, null);
        } else {
            loadUrl(jsCode);
        }
    }

    @Override
    protected int getExtraInsetTop(float density) {
        return (int) (QMUIResHelper.getAttrDimen(getContext(), R.attr.qmui_topbar_height) / density);
    }
}
下面就是使用了,MainActivity.java中的代码如下:
public class MainActivity extends AppCompatActivity {
    private QMUITopBarLayout topbar;
    private QMUIWebViewContainer qmuiwebcon;
    QDWebView mWebView;
    @Override
    protected void onCreate(Bundle savedInstanceState) {
        super.onCreate(savedInstanceState);
        setContentView(R.layout.activity_main);
        QMUIStatusBarHelper.translucent(this);
        qmuiwebcon= (QMUIWebViewContainer) findViewById(R.id.webview_container);
        topbar= (QMUITopBarLayout) findViewById(R.id.topbar);
        topbar.setTitle("WebView测试").setTextColor(ContextCompat.getColor(this,R.color.qmui_config_color_white));
        topbar.setBackgroundColor(ContextCompat.getColor(this,R.color.qmui_btn_blue_bg));
        mWebView = new QDWebView(this);
        boolean needDispatchSafeAreaInset = needDispatchSafeAreaInset();
        qmuiwebcon.addWebView(mWebView, needDispatchSafeAreaInset);
        mWebView.loadUrl("https://www.daimadog.com");
        qmuiwebcon.setCustomOnScrollChangeListener(new QMUIWebView.OnScrollChangeListener(){
            @Override
            public void onScrollChange(View v, int scrollX, int scrollY, int oldScrollX, int oldScrollY) {
                onScrollWebContent(scrollX, scrollY, oldScrollX, oldScrollY);
            }
        });
        mWebView.setDownloadListener(new DownloadListener() {
            @Override
            public void onDownloadStart(String url, String userAgent, String contentDisposition, String mimetype, long contentLength) {

            }
        });
    }
    protected void onScrollWebContent(int scrollX, int scrollY, int oldScrollX, int oldScrollY) {

    }

    protected boolean needDispatchSafeAreaInset() {
        return false;
    }

}
有些多余代码,不用管,不喜欢删掉就行了。任务栏沉浸主要使用了QMUI框架中的QMUITopBarLayout控件,网上有些网友使用的QMUITopBar控件,官方说QMUITopBarLayout对 QMUITopBar 的包裹类,并代理了 QMUITopBar 的方法。配合 QMUIWindowInsetLayout 使用,可使 QMUITopBar 在支持沉浸式状态栏的界面中顶部延伸到状态栏。
然后就使用安卓的写法,找到控件,使用QMUI框架提供的方法设置标题与背景色,这个很简单看上面的代码就知道了,最重要的是要写 QMUIStatusBarHelper.translucent(this);这句,才能沉浸通知栏!别忘了哟。

评论 (1)