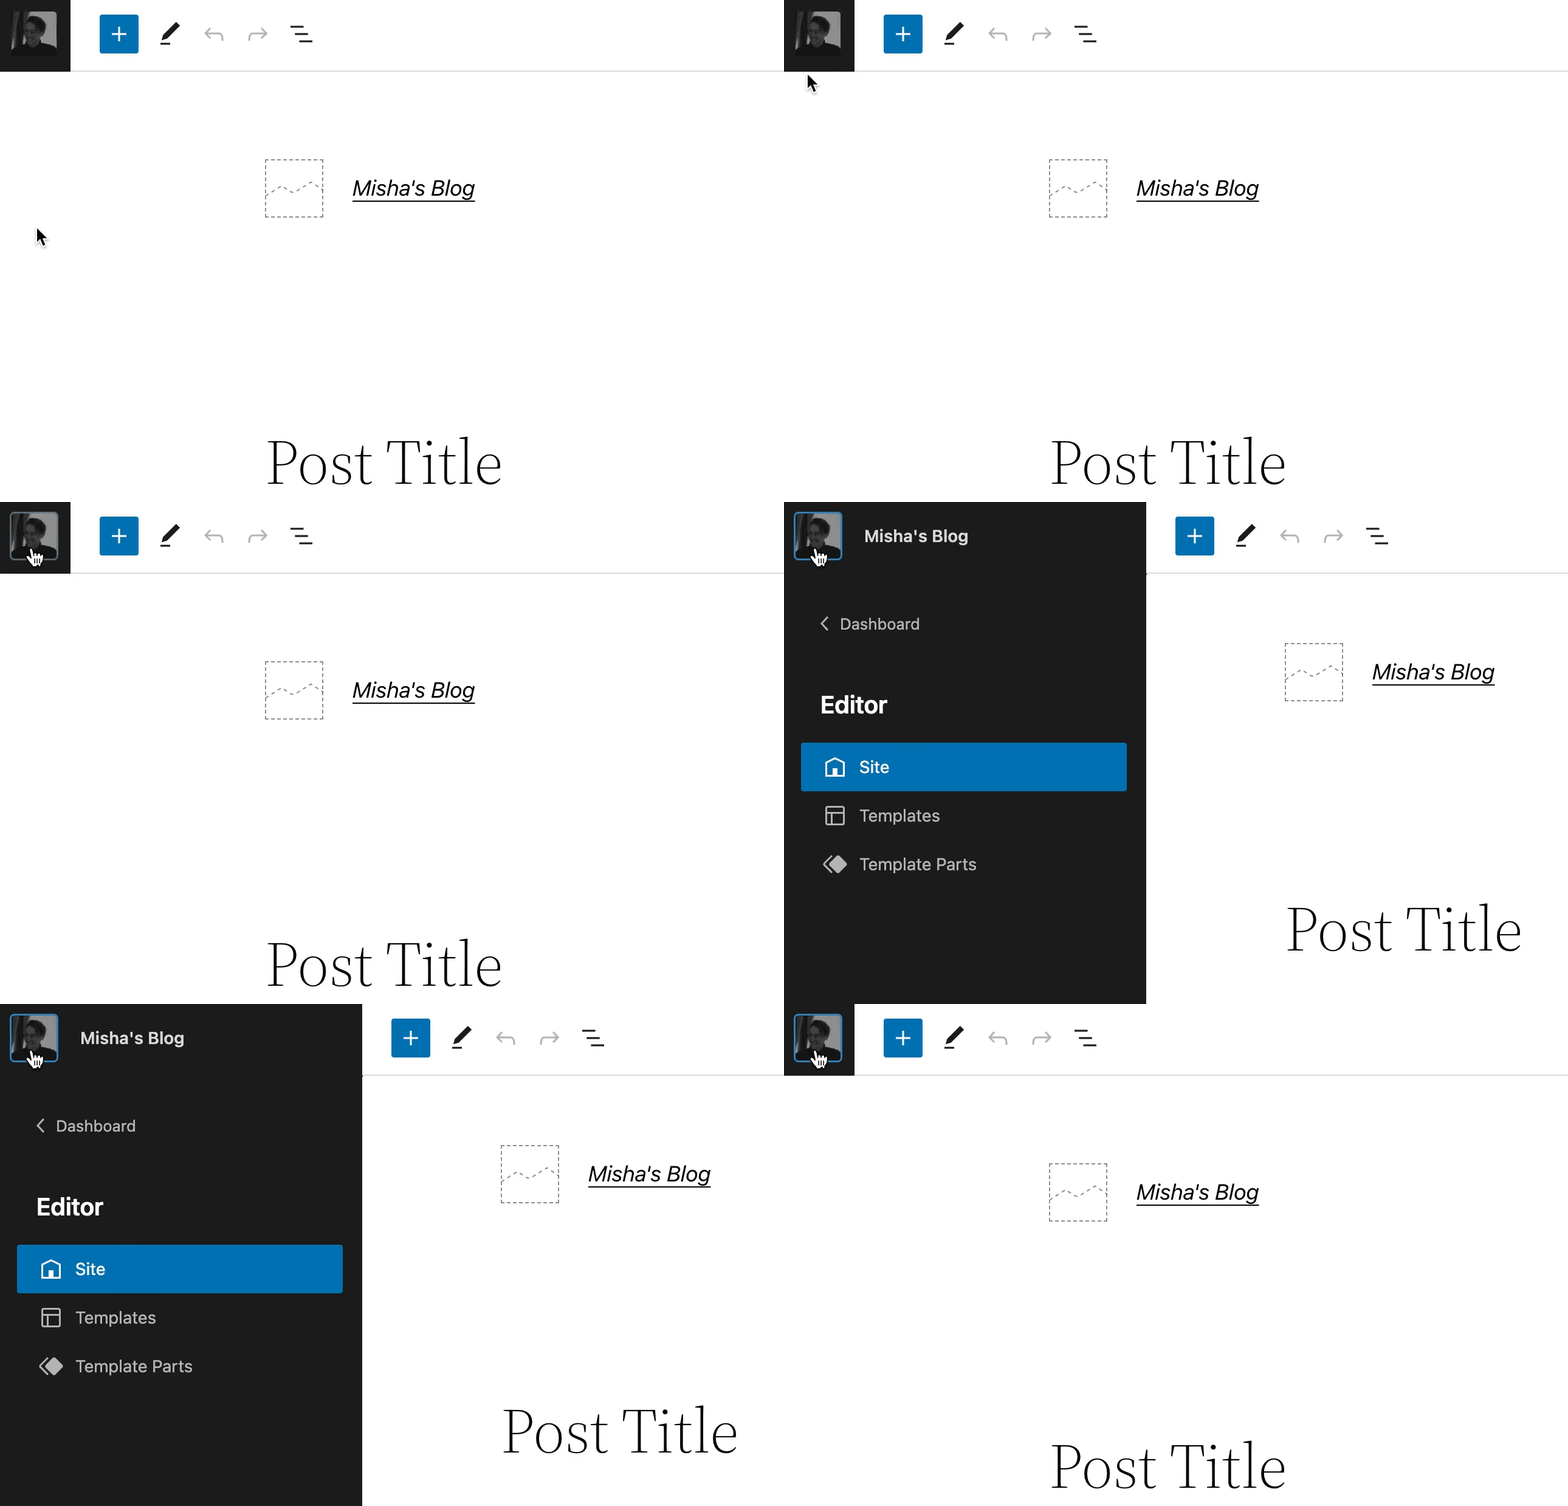
首先,让我向你们展示一下 WordPress 图标是什么意思。你可以在屏幕的左上角找到它。
你可能会注意到我使用了我的自定义照片,但如果你愿意,你可以使用 SVG 图标。
如果你正在寻找一些挂钩此图标的方法,我现在会让你失望。没有钩子,但你可以使用 CSS 轻松完成。
复制
/* hides the logo */
body.is-fullscreen-mode .edit-post-header a.components-button.has-icon svg{
	display: none;
}
/* adds a custom image */
body.is-fullscreen-mode .edit-post-header a.components-button.has-icon:before{
	background-image: url( 'YOUR IMAGE URL' );
	background-size: cover;
	/* you can the image paddings with the parameters below*/
	top: 10px;
	right: 10px;
	bottom: 10px;
	left: 10px;
}
还有一件事,以防你不知道在哪里添加 CSS。
它可以很容易地用admin_head钩子插入。
复制
add_action( 'admin_head', 'misha_custom_fullscreeneditor_logo' );

function misha_custom_fullscreeneditor_logo(){

	// it is not a necessary thing but it prevents this CSS to be added on every WordPress admin page
	$screen = get_current_screen();
	if( ! $screen->is_block_editor ) {
		return;
	}

	echo '<style>
	HERE
	</style>';

}该admin_head片段可能会转到你当前或子主题functions.php文件或自定义插件。
复制
body.is-fullscreen-mode .edit-post-header a.components-button.has-icon svg,
body.is-fullscreen-mode .edit-site-navigation-toggle button.components-button.has-icon svg{
	display: none;
}

body.is-fullscreen-mode .edit-post-header a.components-button.has-icon:before,
body.is-fullscreen-mode .edit-site-navigation-toggle button.components-button.has-icon:before{
	background-image: url( 'YOUR IMAGE URL' );
	background-size: cover;
}

评论 (0)